
Home
Newslog
Audio Processing
Image Processing
Color Cube
Color Replacer
Contrast Mask
Hue Restorer
Pano Warp
Perspective Transf.
Pinocchio
Sliding Tile Puzzle
Vignette Corrector
Wire Worm
Articles
Music
Gallery
Links
Donate
Contact

Pano Warp
This plugin lets you perform pixel transformations used in panorama stitching. I am well aware of some excellent panorama stitching tools out there which do it all automatically without you having to bother much. These work fine if you take your pictures with a tripod and make sure the horizon is in the middle, but if you don't, you can have a real hard time. There is also the problem with curved lines in architecture photography. Check out the examples below and you'll see what I mean.The Pano Warp plugin will give you full control, but that also means you have to play around a bit. You can use it for preprocessing single frames and compose your panorama the pedestrian way (e.g. with Photoshop using layers). This is somewhat tedious but I occasionally encounter situations where this is the only way I can get a decent stitch. Since this preparation is an iterative process, I found it useful to provide an option to save and load up to five different parameter settings. A simple facility to compensate barrel distortion and vignetting also comes in handy.
You might also want to use Pano Warp for post processing, e.g. switch between projections or re-adjust the horizon height. The filter lets you reposition and resize the output image. Grid lines can be displayed both before and after transformation.
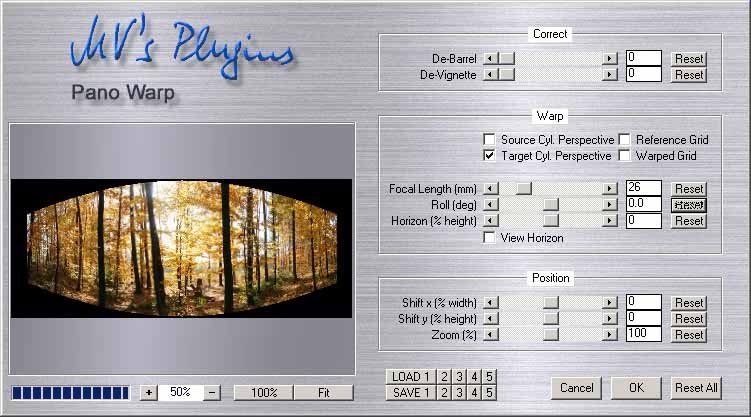
Here is a screenshot of the Pano Warp plugin:
History of Changes
Version 4.5 (current version)- resizeable GUI
- support for 16 bit/channel images
- support for grayscale images
- added Vista compatibility
Downloads
Download Pano WarpExamples
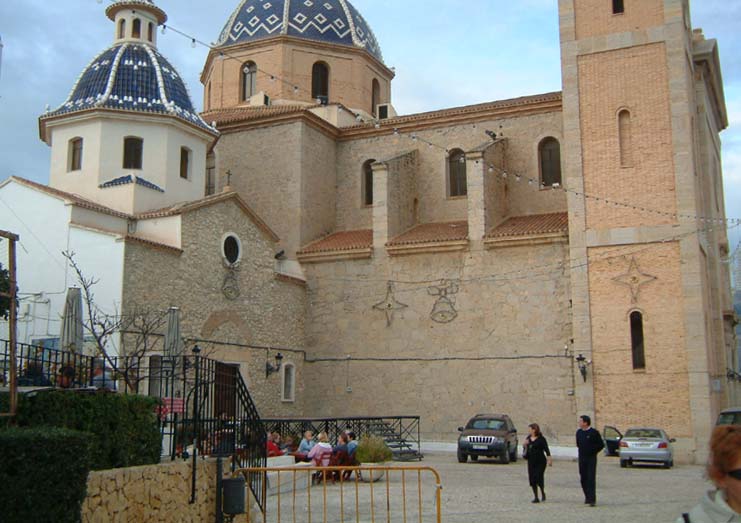
The first example is the Santa Ana church in Altea, Spain. These are the original shots: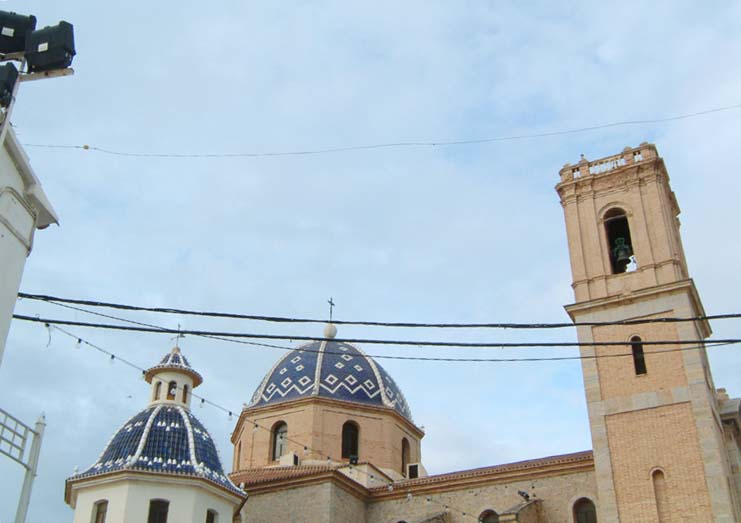
Here is the stitched image (with most stitching applications you have to rotate the single frames by 90 degrees, stitch them in a row, and finally rotate back by -90 degrees):
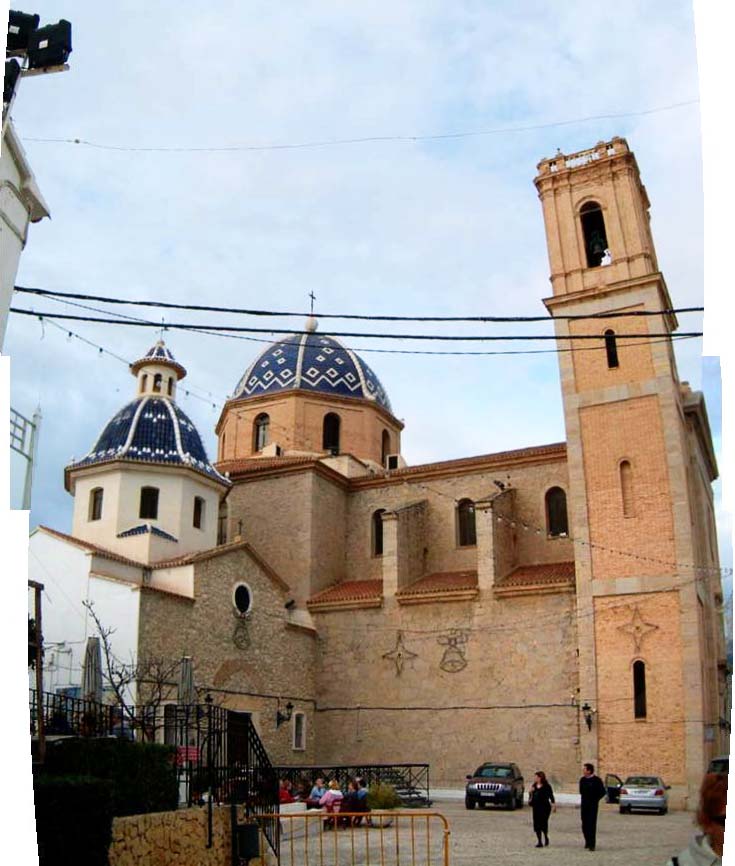
Seamless fit, but obviously the curved distortion is unacceptable. The problem arises from the cylindrical projection. In this case you would rather want a planar projection. Below is the result after throwing the image at Pano Warp and changing the projection from cylindrical to planar (performing the same 90 degree excersise as above):
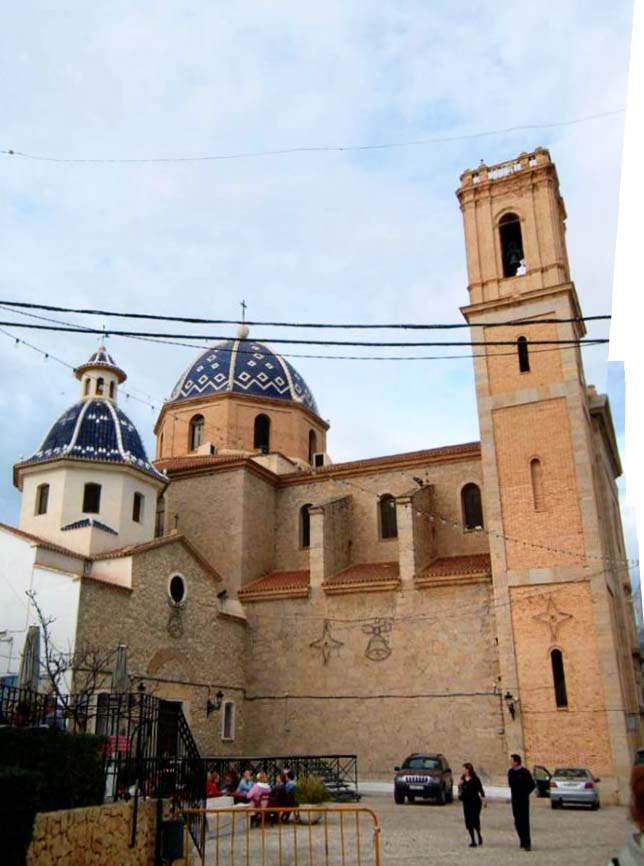
That's much better. However, it could still be improved by applying a bit of perspective correction. I did that (and I also cloned away some of the disturbing cables), go to the Gallery section to see the final result.
My next example is Canyamel bay in Mallorca, Spain. These are the original shots:
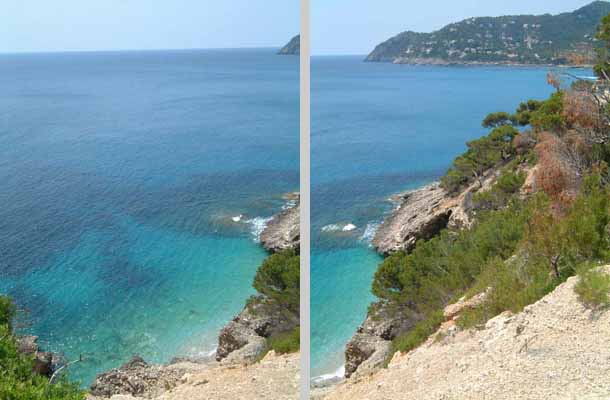
Here is what happens when you attempt to stitch them straight away:
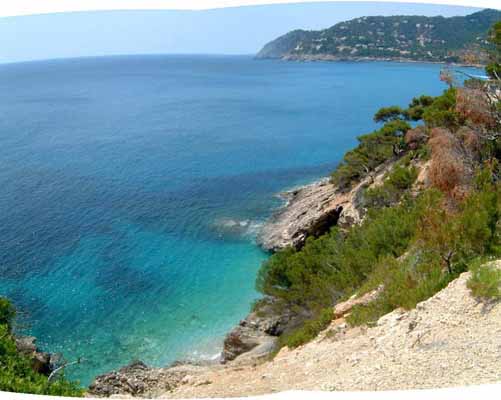
Not good, there are ghost images in the lower part and the horizon is wavy. The following result is obtained when you rotate the single frames appropriately before stitching:
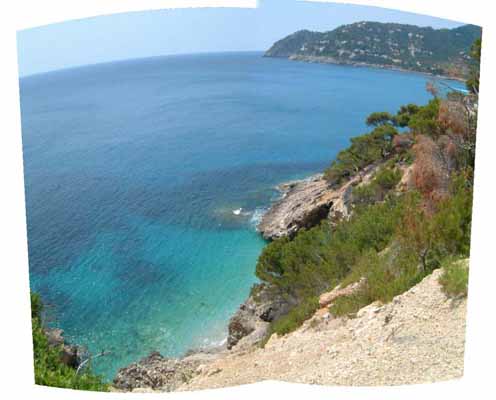
Seamless fit without ghost images, but at the price of a curved horizon. The trouble is that the horizon is off center in this image, hence it will appear curved in a straight cylindrical projection. There are two ways out: either remap to a planar projection, or choose a cylindrical projection with appropriate horizon setting. I opted for the latter, here is the result:
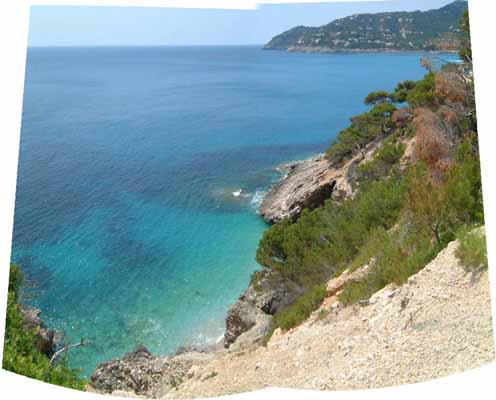
There you go! Straight horizon as it should be.
Related Stuff
Of course I have to mention Helmut Dersch's Panorama Tools and the various GUIs ( PTGUI, PTAssembler, Hugin, PTOpenGUI) that folks have written for Panorama Tools.Panorama Factory used to be my favorite stitching product.
Autostitch is a remarkable piece of software. You just throw a bunch of images at it and it will automatically put them in order, switch between landscape/portray if necessary, discard any images not belonging there, and finally do all the warping, matching and blending. Believe it or not, it will even stitch multiline panoramas.
However, then I discovered the even more remarkable Image Composite Editor. It will stitch and blend automatically, usually with outstanding quality. You can choose among various projection methods. It will do multirow panos. And most notably, it is completely free!
A nice tutorial can be found here: part 1 is on panorama stitching as such, part 2 is on panoramic image projections.
© 2008 by Martin Vicanek